OAuth IMAP Google#
Install the OAuth IMAP application#
- From
setup>plugins, installOauth imap.
Creating a project#
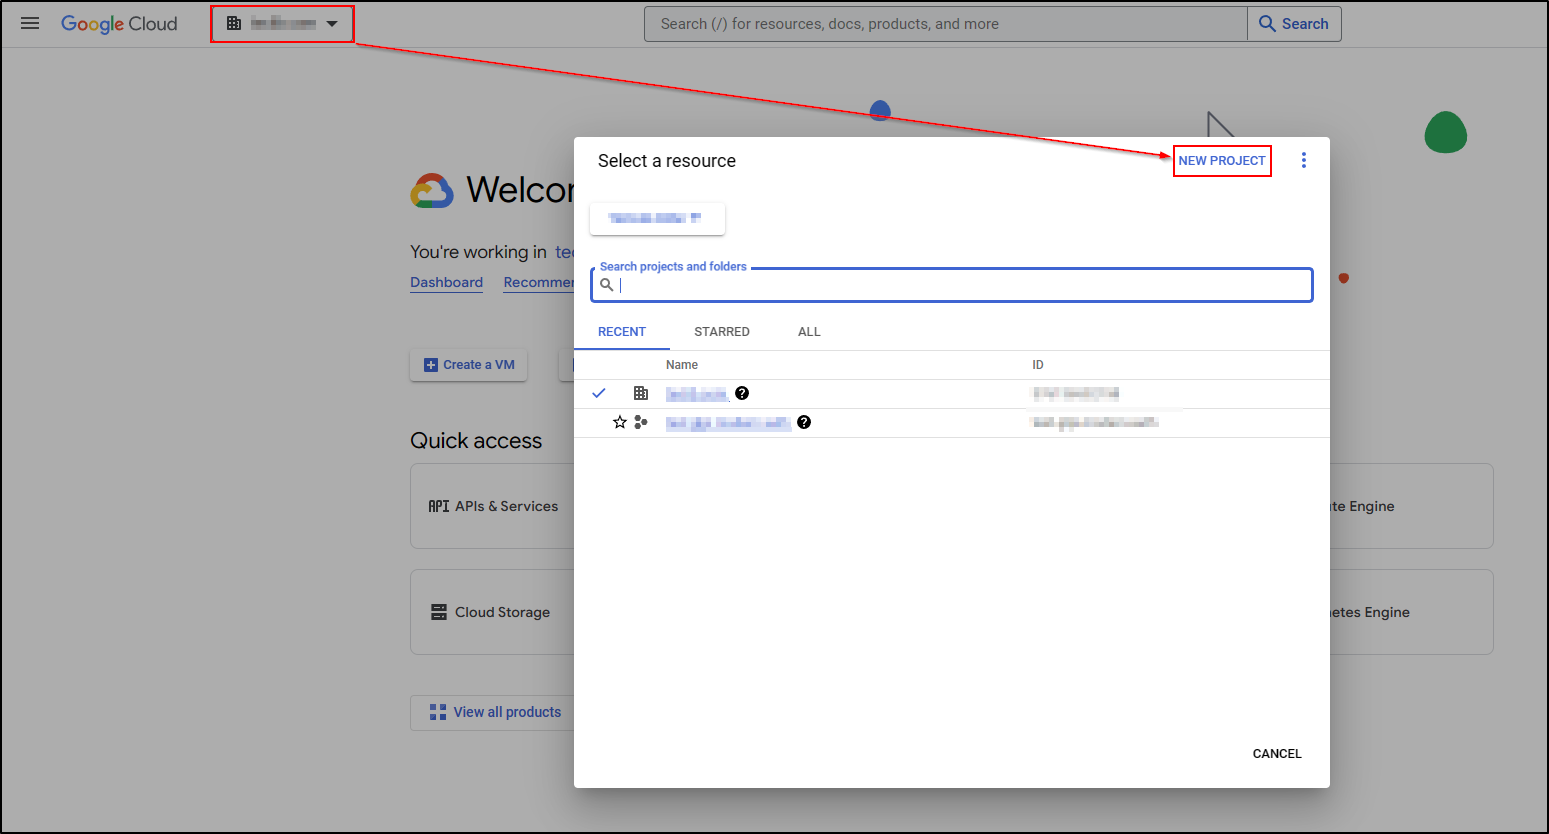
- From your Google console (administrator access is required), go to your organisation then new project
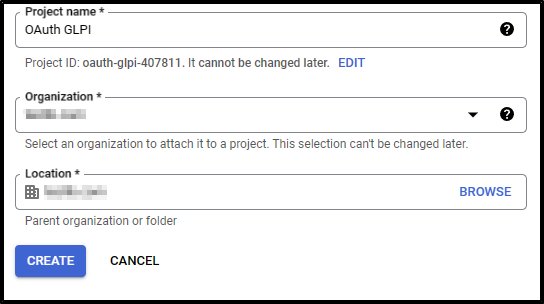
- Enter the name of your project
- Click on
create
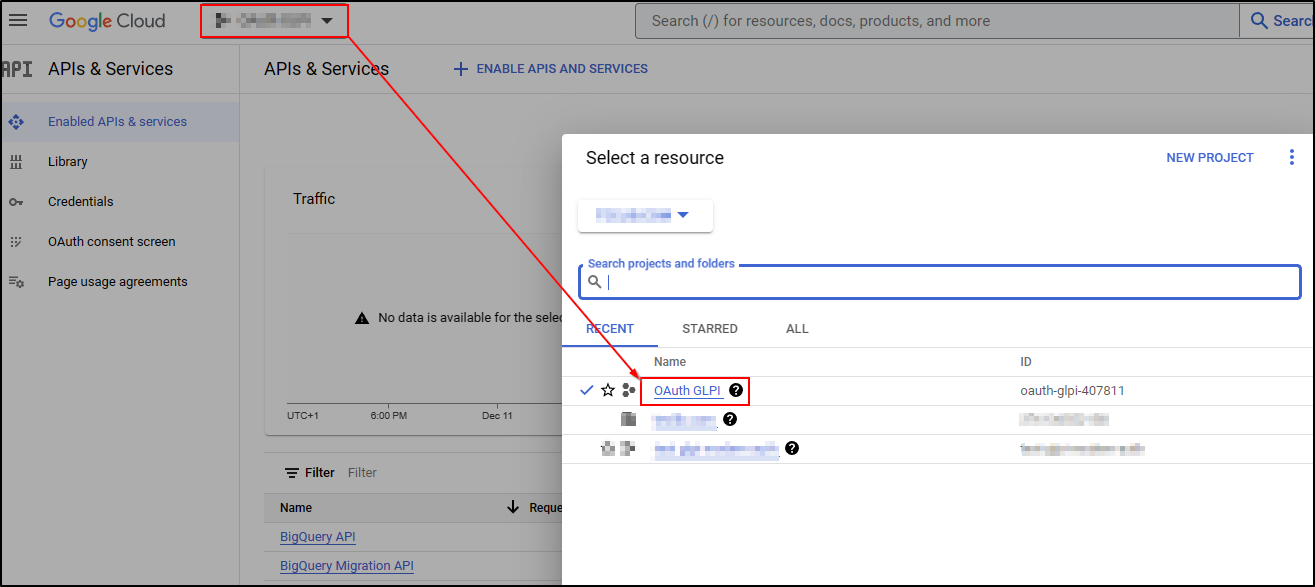
- Return to your organisation,
- Select your project
Setting up Oauth access#
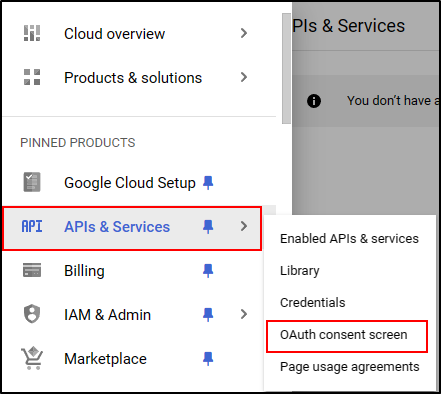
- From the
menu, click on
APIs & Services. - Then
OAuth consent screen.
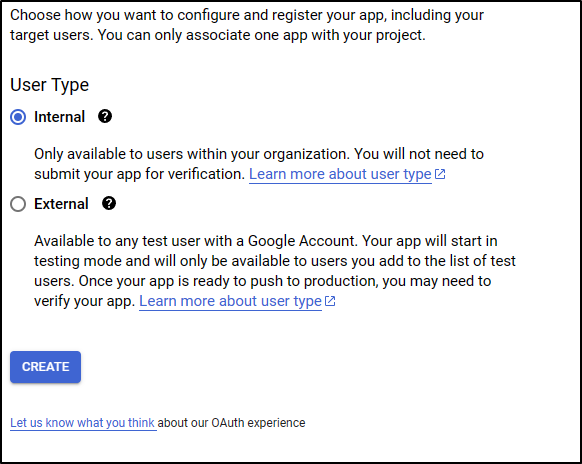
- select the type of access that will be granted to the application (internal or external users)
- Then click on
create.
- Enter (as a minimum) a name for the application, an email address for application support and the developer's email address (this information is compulsory).
-
Click on save and continue.
-
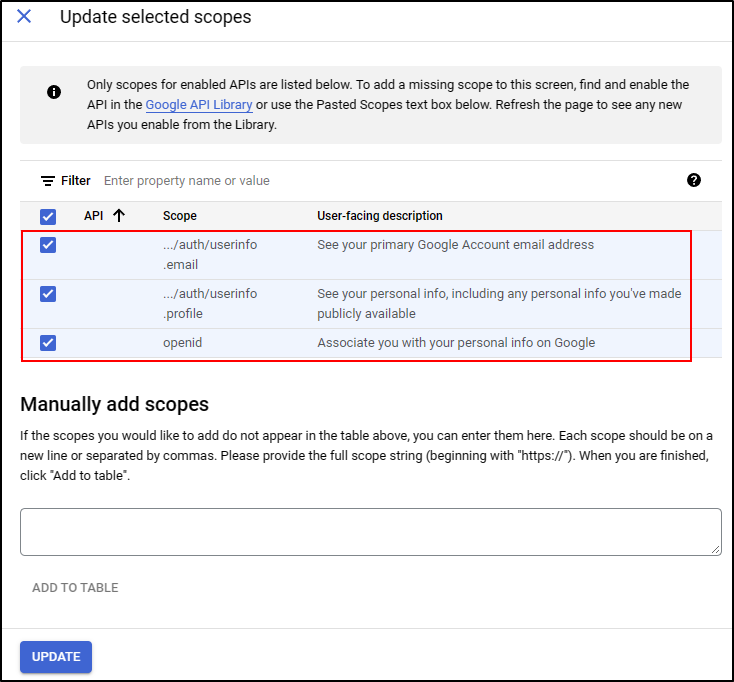
In the
scopesection, click onadd or remove application fields. - Add
auth/userinfo.emailauth/userinfo.profileandopenid.
- Click on
update -
Then
save and continue## ID settings -
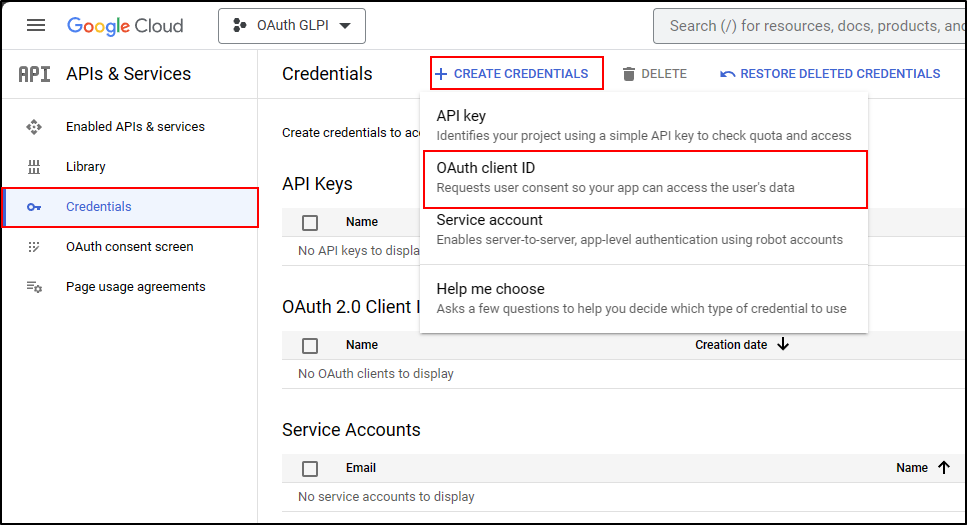
From the
credentialsmenu, click oncreate credentialsand thenOauth client ID.
- Select the type of application "web application".
- Enter an application name,
- In the
Authorized redirect URIssection, enter the GLPIcallback URL.
-
Click on
create -
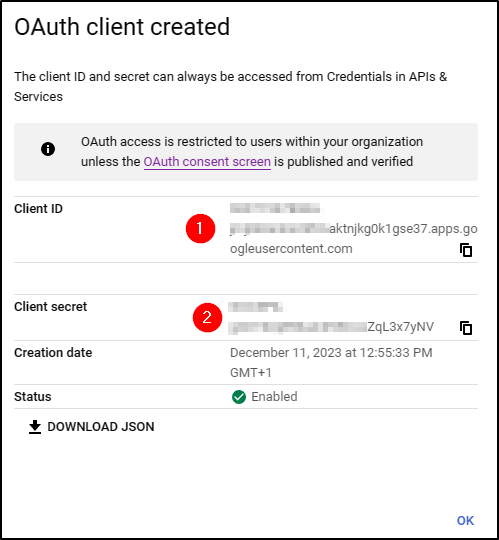
A page appears with the identifier values. Keep this information as it will be requested in GLPI.
Setting up GLPI#
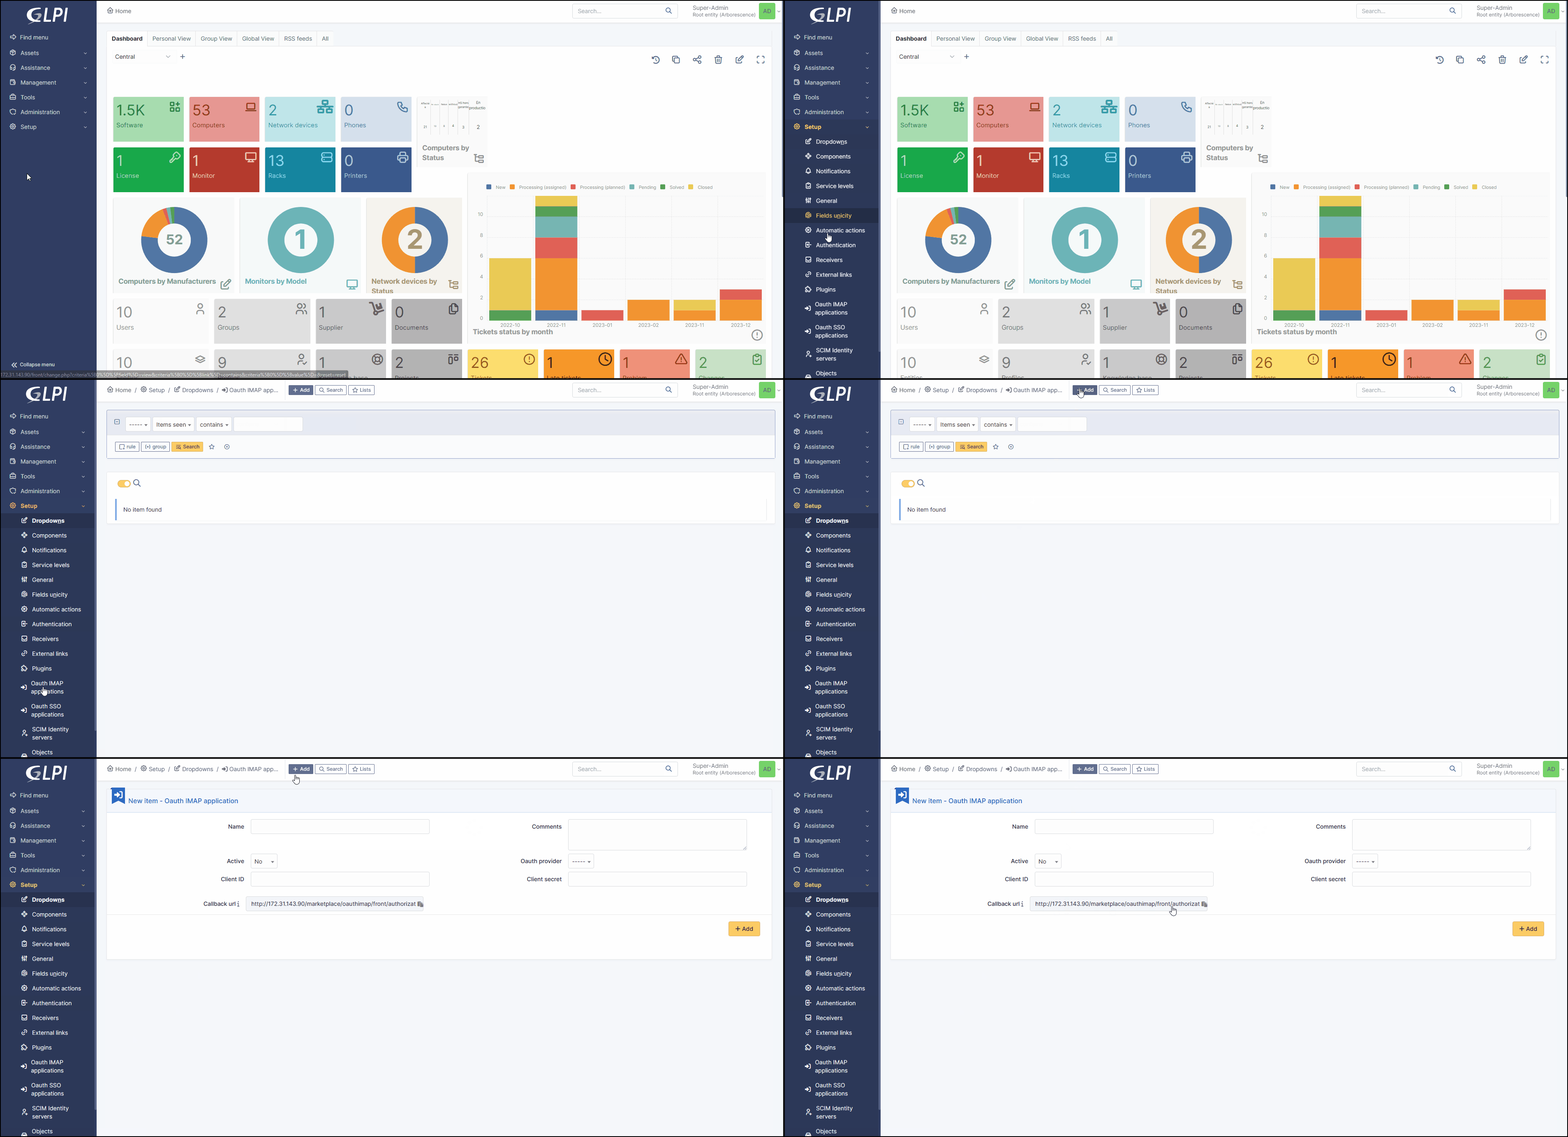
- From
setup>Oauth imap applications, click onadd. - Select
Googlein theOauth providerfield - Enter the
client ID(number 1 on the previous screenshot) - Enter the
client secret(numbered 2 on the previous screenshot)
- Click on
add
Add an authorisation#
- Once the application has been created, go to the
Oauth authorizationtab - click on
create an authorization - You will be asked for an account using IMAP services
- Accept the necessary authorisations
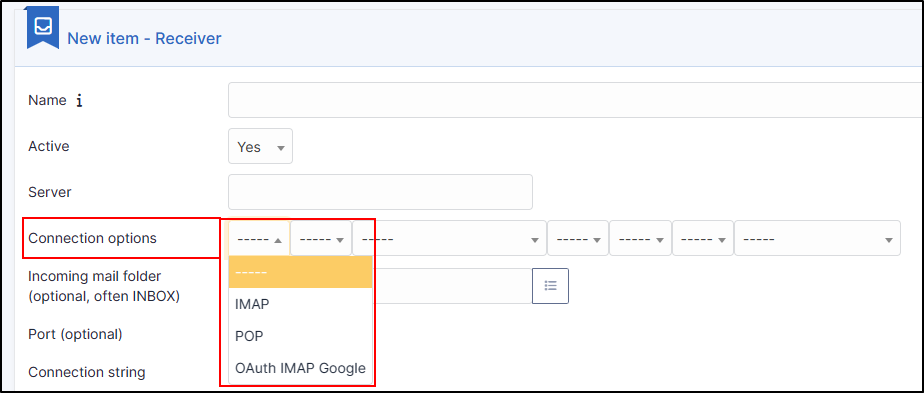
You can now configure your Oauth IMAP application in the receiver
Last update:
11/12/2023

