Setup notifications#
Your GLPI Cloud instance has three types of notifications:
- Navigator
- Collaborative tools (via plugin)
Most of GLPI´s notifications have to be configured in the Configuration> Notifications menu
Let's see what are the different types of notifications and how to configure them:
Navigator#
Depending on your browser this type of notifications will display a message on your screen alerting you about new ticket, follow-up, etc.
To be able to use this type of notifications you must first activate tracking and activate browser notifications:
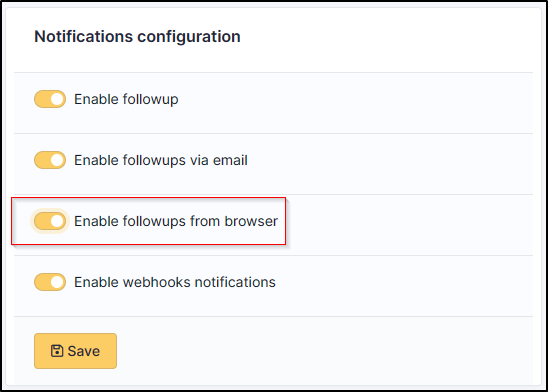
You have to save your choice to get to the second configuration menu in which you will edit the configuration of browser notifications:
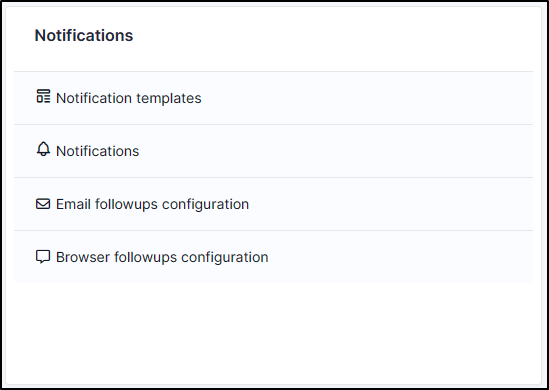
Once in the configuration menu:

You will be able to choose:
-
Your notifications sound
-
The interval for checking new notifications (in seconds)
We advise you not to change the address of the icon, it is not yet possible to personalize it in our Cloud offer.
Save your choices and you can launch notification via test button.
Allow notifications
Don’t forget to allow notifications in your browser too!
Mail#
Warning
GLPI Network Cloud environment does not allow unauthenticated / unsecured SMTP connections ( port 25 )
This notification will send you an email when you receive a new ticket, follow-up, etc.
To be able to use this notification, you must first enable tracking and enable email notifications:
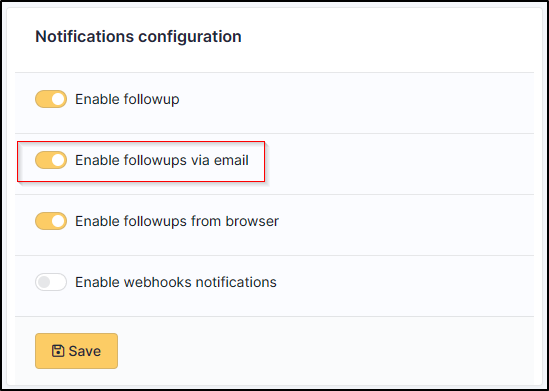
You should save your choice to obtain the second configuration menu in which you will edit the configuration of email notifications:
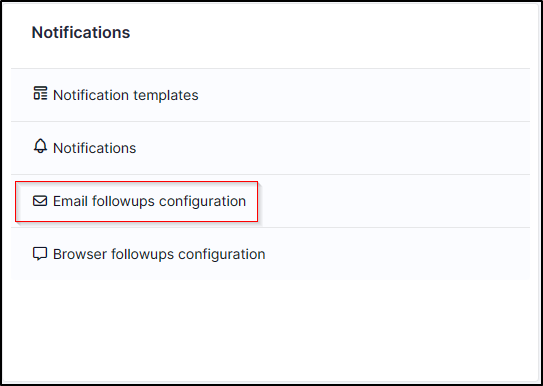
Once in the configuration menu:
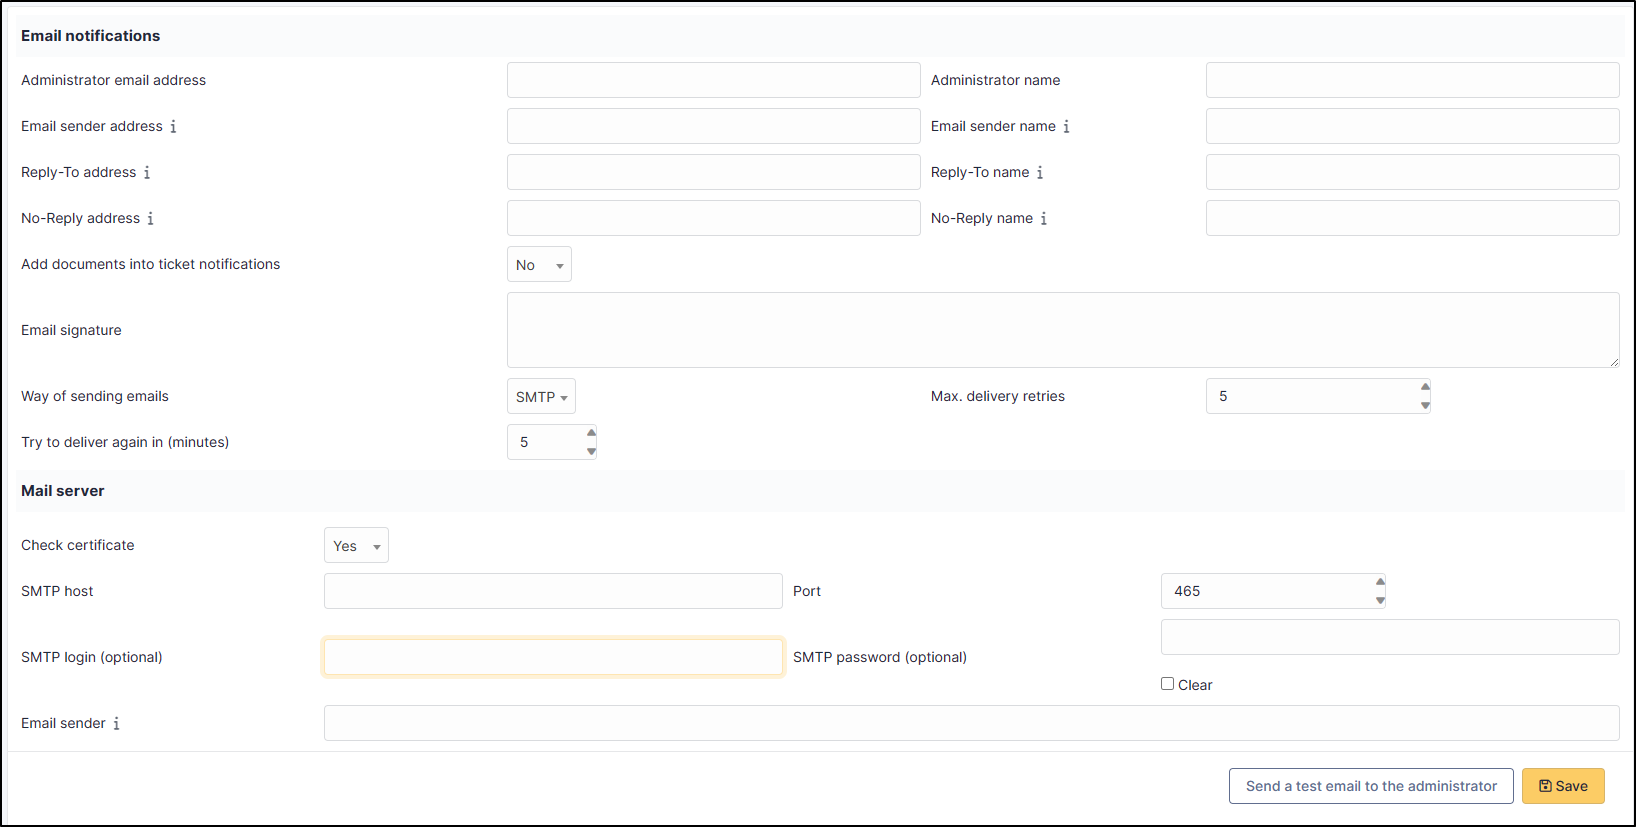
Administrator email: the email address of the GLPI general administrator. This address is used when the Administrator is selected as the recipient of notification;
Administrator name: the administrator name used indicates the name associated with the administrator's email;
Response email (if necessary): email address used when the user replies to notification sent by the administrator;
Signature of messages: text added at the end of each notification. This feature is global, but can be adapted for each entity (see configuration of entity);
Method of sending emails:
- PHP: the sending is carried out by our relay mail SendGrid, do not hesitate to use the other sending modes if you encounter reception problems;
- SMTP: sending using the SMTP protocol;
- SMTP + SSL: sending using the SMTP protocol, encapsulated in SSL tunnel;
- SMTP + TLS: sending emails more secure than SMTP + SSL;
- SMTP + OAUTH : send mail via an authorization server (OAuth2.0 standard) ;
SMTP host (s) [: Port] (separator;): name or IP address of the mail server. It is possible to specify the port by adding the character "colon", then the number. Several servers can be specified by separating them with a semicolon;
SMTP login (optional): the user authorized to connect to the SMTP (leave empty for anonymous connections);
SMTP password (optional): the user's password. It is possible to erase the password by checking the erase tick box and confirming this choice.
Save your configuration and send a test email to check your settings.
Warning
In the case of a Cloud instance, it is not recommended to use PHP as a method of sending mail. Indeed, Cloud instances use a Sendgrid relay for sending mail and can sometimes be blacklisted or considered as SPAM by certain mail servers.
Documentation de fournisseurs de messagerie sur ce sujet :
Collaborative tools#
GLPI with the collaborative tools plugin allows you to receive notifications in third-party solutions.
As a reminder, the available solutions are:
- Mattermost
- Microsoft teams
- Rocket.Chat
- Slack
- Telegram
To be able to use this notification, you must first activate the tracking and activate the notifications by webhooks:
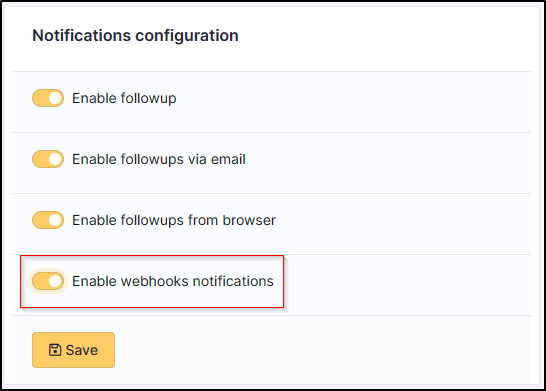
You have to save your choice to obtain the second configuration menu in which you will edit the configuration of notifications by webhooks
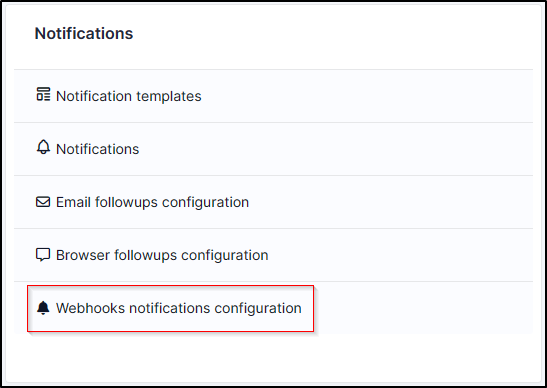
Once in the configuration menu:
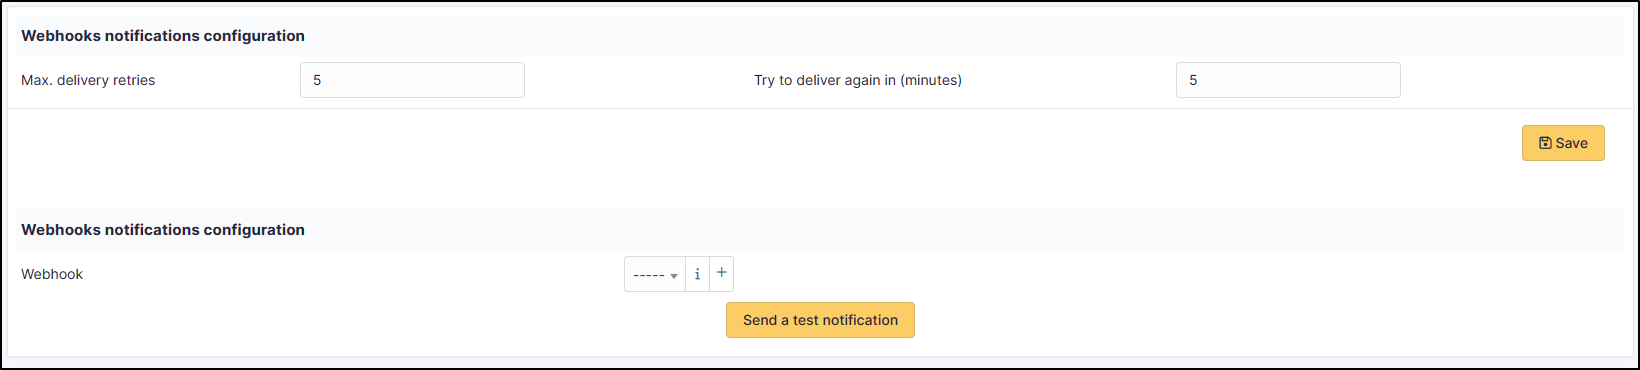
Here it is possible to define:
- The maximum number of sending attempts
- The frequency, in minutes, at which send will be attempted
- The Webhook (s) used
Before you can select a Webhook, you must create it on GLPI side.
To do this, click on the icon . You will arrive on the Webhook creation pop-up window:
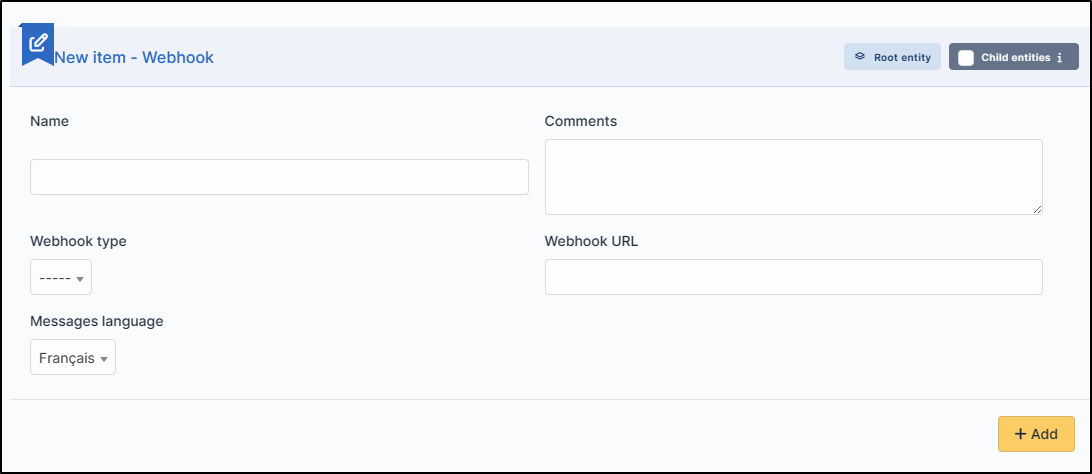
Here you can define:
- The name of your Webhook (the name on GLPI side, it does not influence the configuration.)
- Type of Webhook (which third party solutions)
- The URL of this Webhook
- The language in which the messages will be sent
- A comment (simple text field for information only, it does not influence the configuration)
Once your configuration items have been entered, click on "Add" to register your Webhook.
In the pop-up window you can select the Webhook from the drop-down list.
Save your configuration and send test notification to check your settings.
Get webhook URL#
Here you will find quick guides to help you to get the URL of the webhook to integrate into GLPI:
Mattermost#
Full procedure here
- Logged as administrator, go to the main menu.
- Click on Integrations
- Select incoming webhooks
- Add a new one
- Define a title and select channel
- After registration, you will get the webhook URL.
Microsoft teams#
Full procedure here
- Navigate to the channel where you want to add the webhook and select (•••) More Options from the top navigation bar.
- Choose Connectors from the drop-down menu and search for Incoming Webhook.
- Select the Configure button, provide a name, and, optionally, upload an image avatar for your webhook.
- The dialog window will present a unique URL that will map to the channel. Make sure that you copy and save the URL—you will need to provide it to the outside service.
- Select the Done button. The webhook will be available in the team channel.
Rocket.Chat#
- Logged as administrator, go to the administration menu
- Click on the Integrations menu
- Add a new integration
- Select incoming webhooks
- Define the webhook parameters
- After registration, you will get the webhook URL.
Slack#
- You need to add an application to your team. (The link is found at the bottom of the left banner)
- Select incoming webhooks
- Add new configuration
- Select the channel in which you wish to be notified.
- You will get the URL of the webhook.
- Optional: you can configure a name and logo in webhook.
Telegram#
Full procedure here
- First, you need to create a Telegram Bot by chatting with @BotFather in the application.
- You will get an API token corresponding to this Bot.
- The webhook URL will therefore be: https://api.telegram.org/bot.
- Then, as an administrator, you must add this bot to the channel in which you want to be notified.
- The Telegram API requires an additional parameter called chat_id which corresponds to the id of the channel concerned.
- To get it, transfer any message from the concerned channel to the @getidsbot bot.
- You will get the value of the id in the forward_from_chat property.
References#
Documentation GLPI "Notifications"