Inventory printers and network hardware#
GLPI allows you to automatically inventory your switches, printers, routers, etc... This part requires the installation of the GLPI Inventory plugin available in the marketplace and a GLPI agent installed in the park.
How it works#
Inventory takes place in 2 stages:
- network discovery, which scans the network for detected devices.
- An SNMP inventory, to provide the SNMP information authorized by the manufacturer (serial number, OS, etc.) for each type of equipment.
These 2 actions will be managed by tasks. The principle for network hardware and printers is the same. In this example, a printer will be remounted to demonstrate the principle.
Prerequisites#
- GLPI Inventory installed and up to date (from marketplace),
- a GLPI agent installed in the park (also up to date with the necessary modules installed),
- Inventory enabled (administration > inventory enable)
- network hardware or printer capable of accepting SNMP requests (preferably V3, but V1 and V2 are also accepted).
Sequence#
SNMP identifiers#
Make sure you have correctly configured your SNMP identifiers on the machine side. Refer to the official hardware documentation if necessary.
- Go to
administration>inventory>SNMP credentials
Info
In SNMP V3, identifiers must be configured. In V2c and V1, only the name of the community is required. We recommend that you upgrade to V3 as far as possible to ensure maximum security for exchanges between GLPI and your agents.

Then click on
add
- Enter the name you prefer
- Select the SNMP version you want (here V3)
- Next, specify the identifiers and encryption methods for authentication and data:
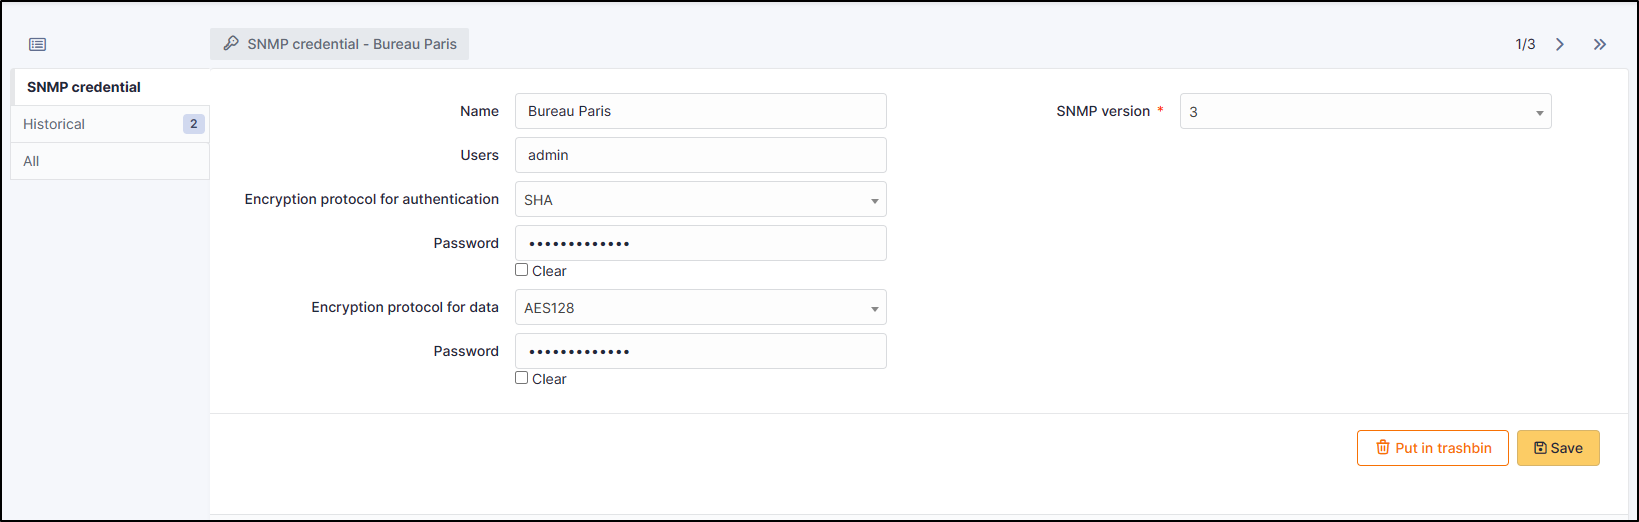
- Clock on
Save
Equipment import and link rules#
By default, rules are created to ensure that detected equipment is created if it does not exist, or merged if it is already in the park. You'll find these rules in
administration >
Rules >
Equipment import and link rules.
You can modify these rules to match the elements you need (serial number, machine name, etc.).
Business rules for equipment#
This part is optional. As each instance is different, this step is specific to your needs and must be adapted. Here, the simplest case will be explained.
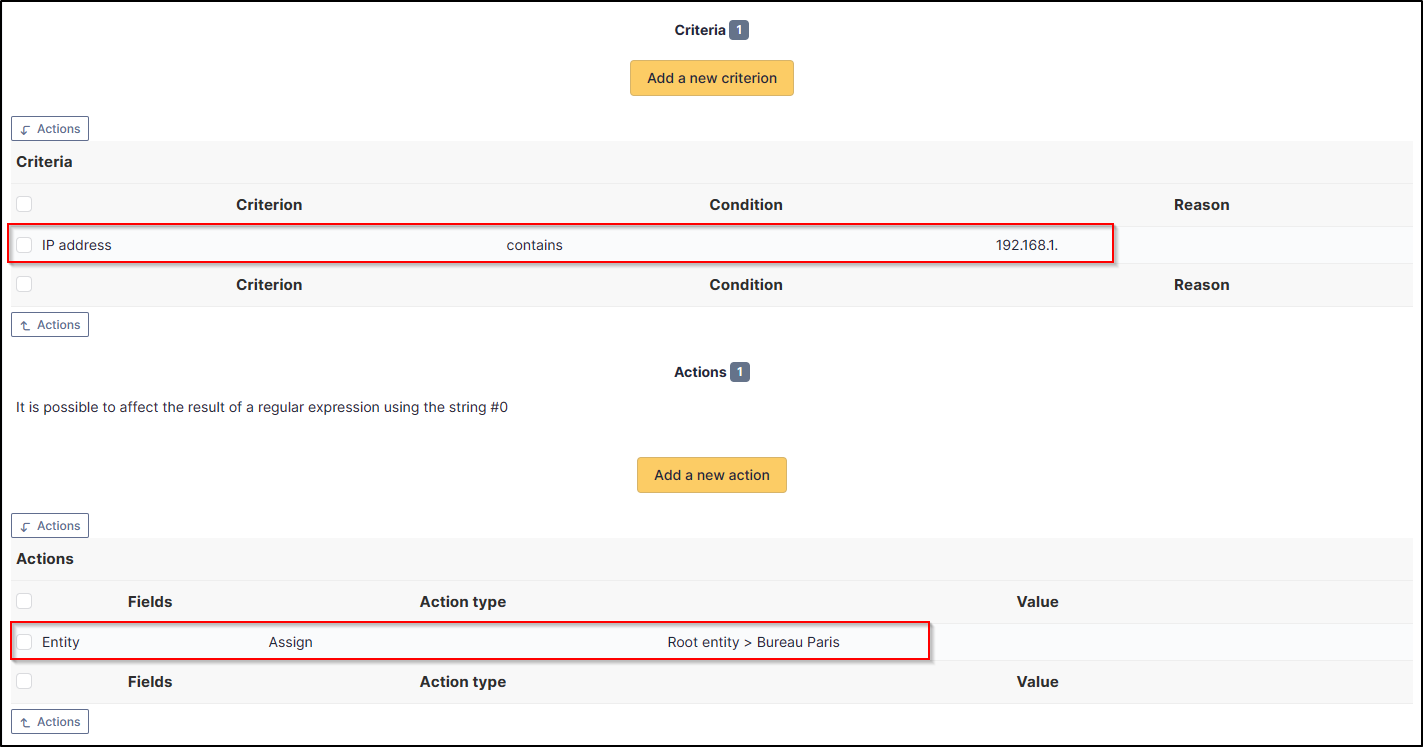
Here we're going to define that everything in the 192.168.1.1 /24 network is brought up in the inventory (provided that the SNMP configuration has been applied to the equipment brought up).
We will therefore create the following rule:
criterion: If my IP address contains 192.168.1-
action: Assign to the entity Paris Office -
Go to
administration>Rules - Click on
Rules on the computer entity(this menu also takes into account the rules for other hardware)
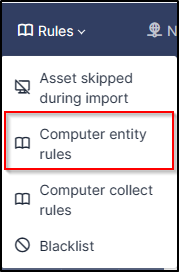
- Then create your rule(s) :
IP range#
In order to perform the network scan, GLPI needs to know which IP range(s) it should scan.
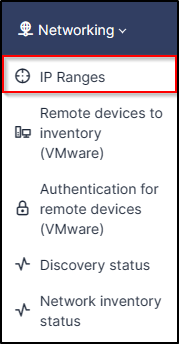
- Go to
administration>GLPI Inventory>Networking>IP ranges.
- Click on
add - Add your IP range(s) :
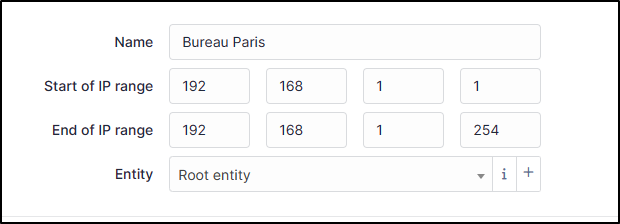
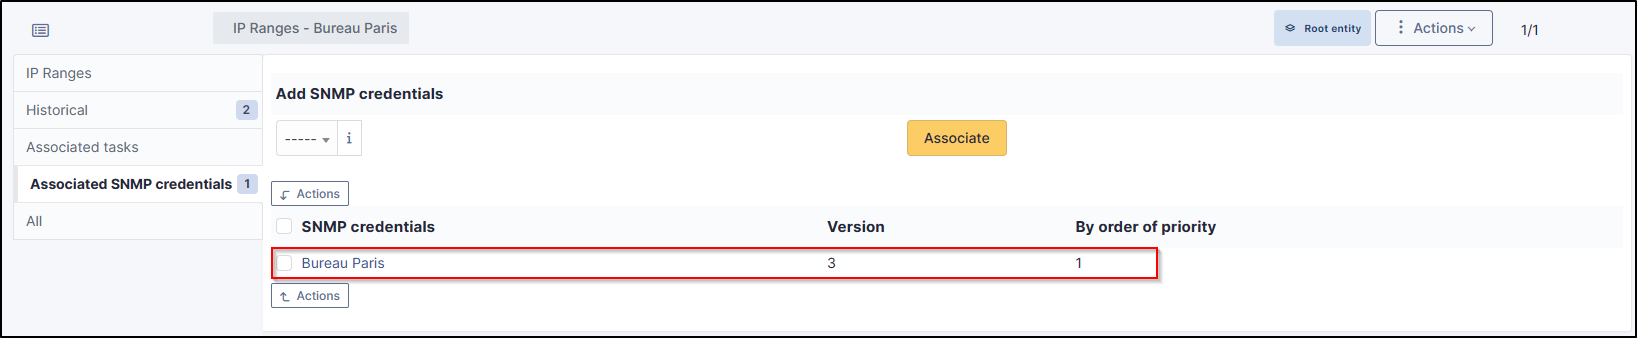
- In Associated SNMP identifiers, add the identifiers created earlier.
To know
This step is important, if you don't associate the SNMP identifiers, your network discovery won't succeed correctly
- Remember to save your changes
Agent authorisation#
A GLPI agent will be dedicated to managing tasks. Once the tasks have been created, the agent will check, during its next inventory, that one or more tasks are available. It is therefore necessary to activate the modules it will need to carry out its tasks correctly.
- In
administration>GLPI Inventory>General>Agent Management, select the agent that will be dedicated to performing the tasks. - In the agent's modules tab, select
network discoveryandnetwork inventory (SNMP) - Click
update.

Creating tasks#
Network discovery#
As explained above, you first need to discover the network in order to locate the equipment in your fleet.
- In
administration>GLPI Inventory>Tasks>Task managementcreate a new task:
- Name this task then click on
add(you can also choose the optionAllows the task to be re-prepared after it has been runso that it can be reloaded and ready for the next run). If required, you can also add scheduled start options or slots in which these tasks can be launched.
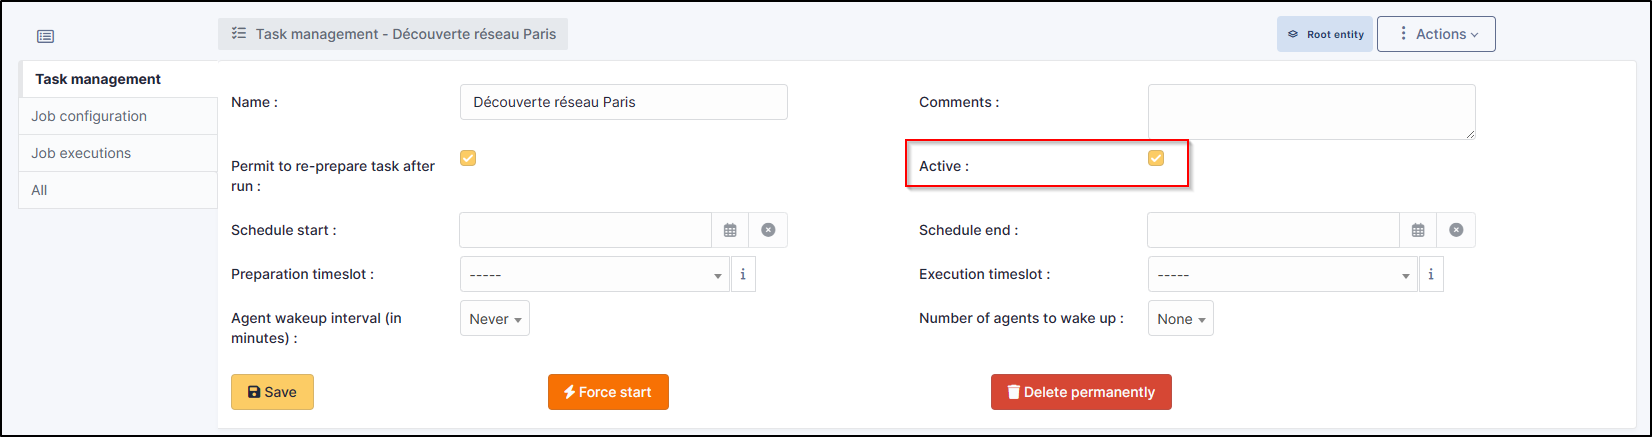
Attention point
Make sure you tick the Active box so that your task can be executed
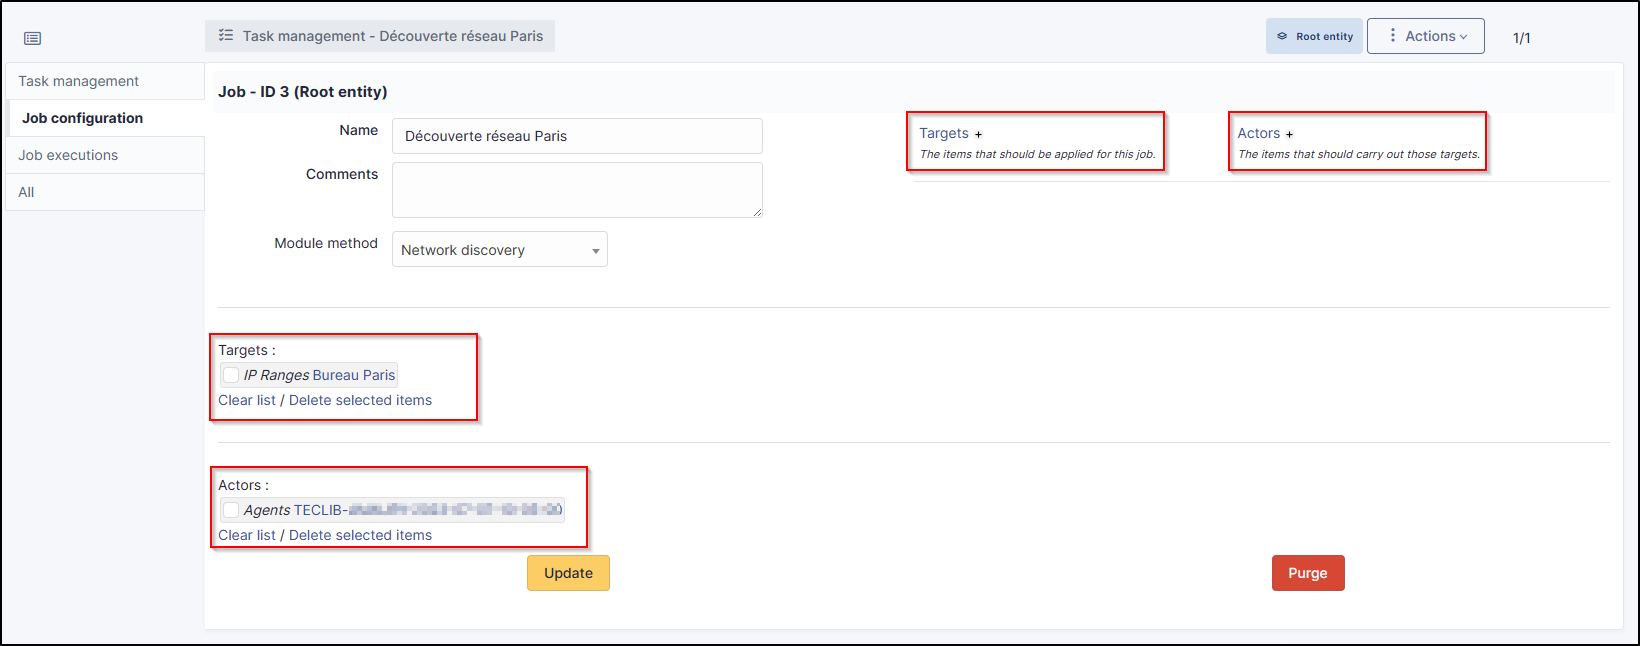
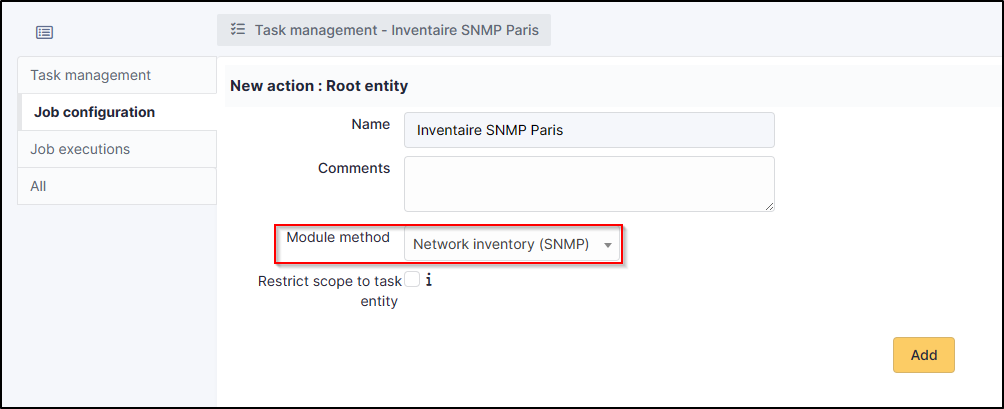
- In job configuration, enter a name
- Select
Network discoveryfrom the drop-down list.
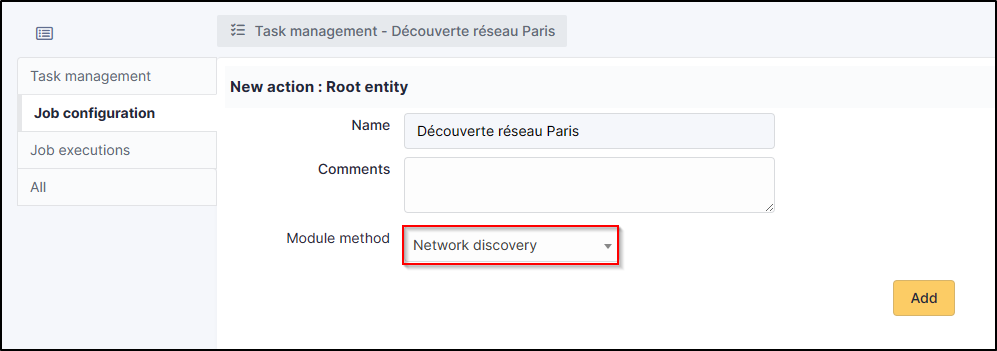
When you click on add, a new insert will appear. The last configuration step is job.
- Click on
next to
target - Add the IP range created earlier.
- Do the same with actors, and select the agent configured for network discovery above.
- Once this information has been entered, you can force the task to be prepared using the option in
task management.
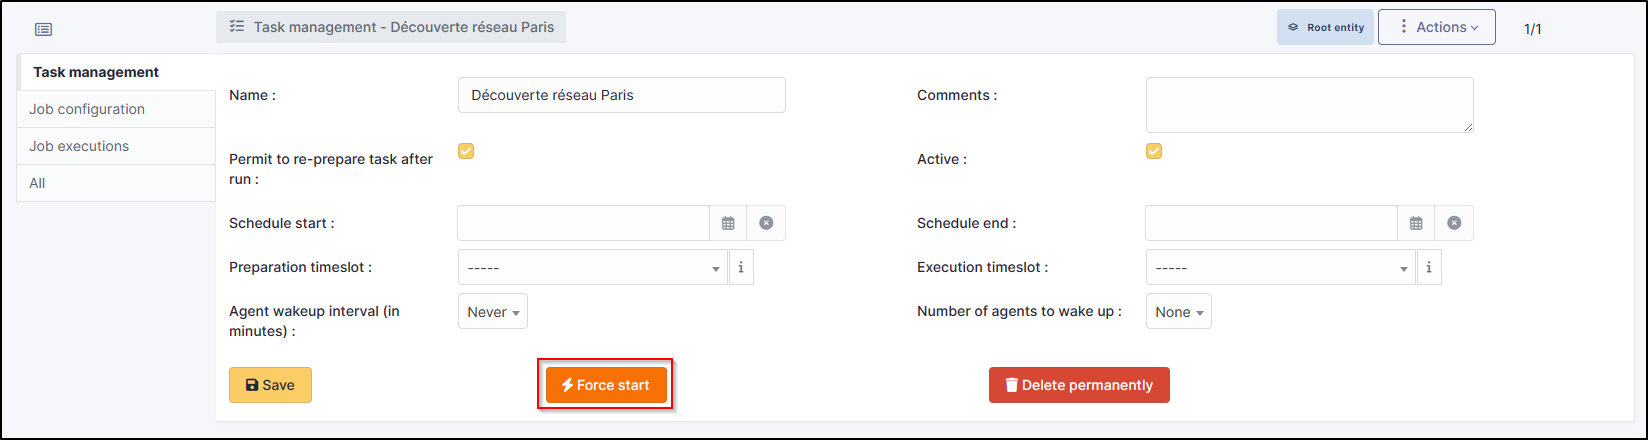
Caution
This option prepares the task but does not execute it. The designated agent will execute the task the next time it is inventoried.
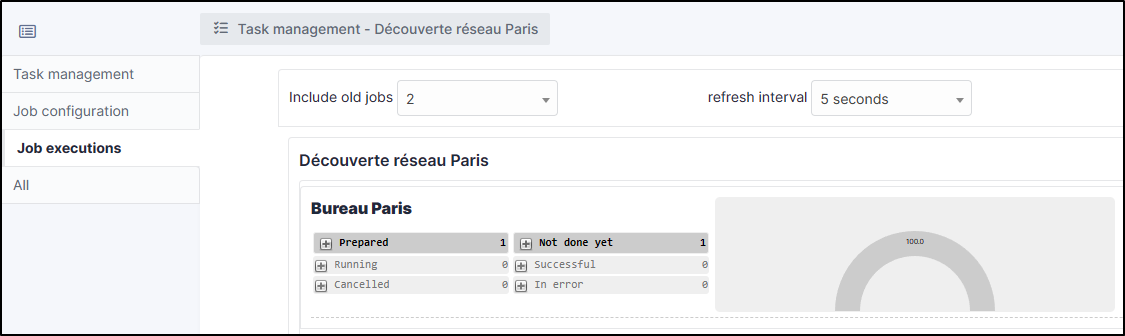
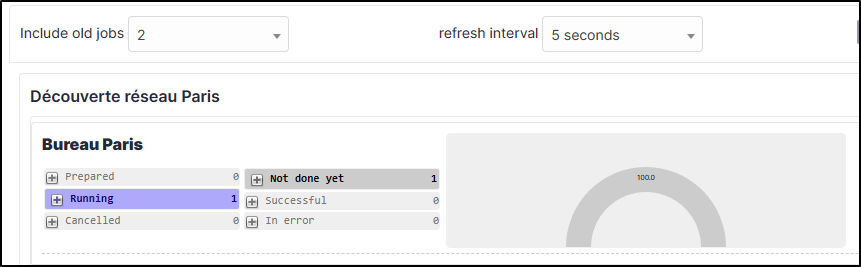
You will notice that it is in prepared status in job execution.
SNMP inventory#
The SNMP inventory will allow you to retrieve information such as cartridges, counters and other information authorised by the hardware manufacturer.
- Go back to
task management - Add a new task
- Proceed in the same way as before and remember to activate the task.
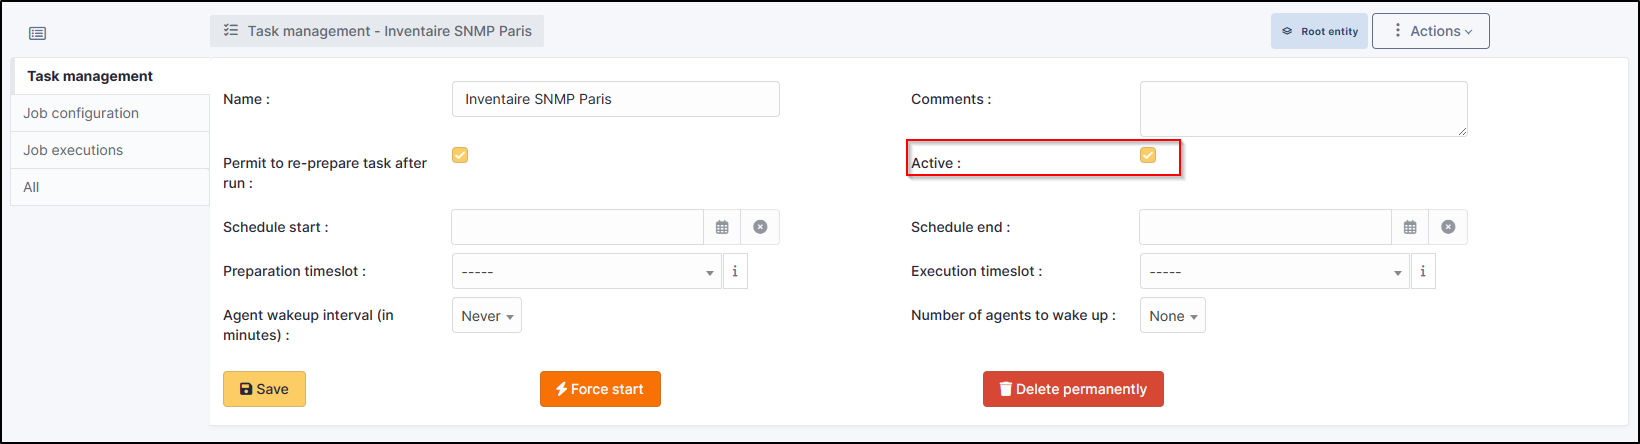
In job configuration enter a name and this time select network inventory (SNMP).
- By clicking on add, do as before and add a target (IP address) and a actor (the agent dedicated to the SNMP inventory).
You can again force the start but GLPI will tell you that no target is detected, which is normal because the discovery has not yet been executed.
Task execution#
The agent is now waiting to be launched so that it can carry out the tasks we have assigned to it. There are several ways to launch the agent:
- Via the web interface where the agent is located, by logging on
http://localhost:62354/and clicking onforce an inventory. - By restarting the scheduled task or the glpi-agent service.
- If you have installed agent monitoring, click on
force an inventory.
The job changes to in progress.
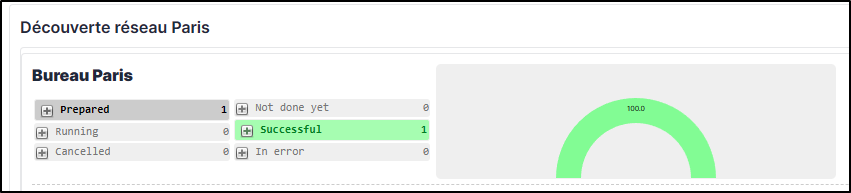
Then to successful
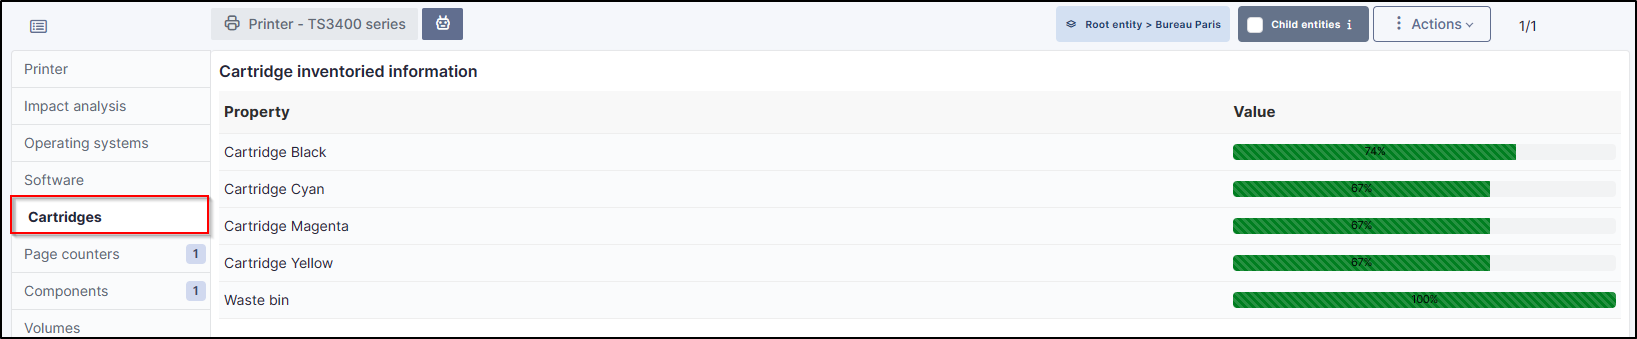
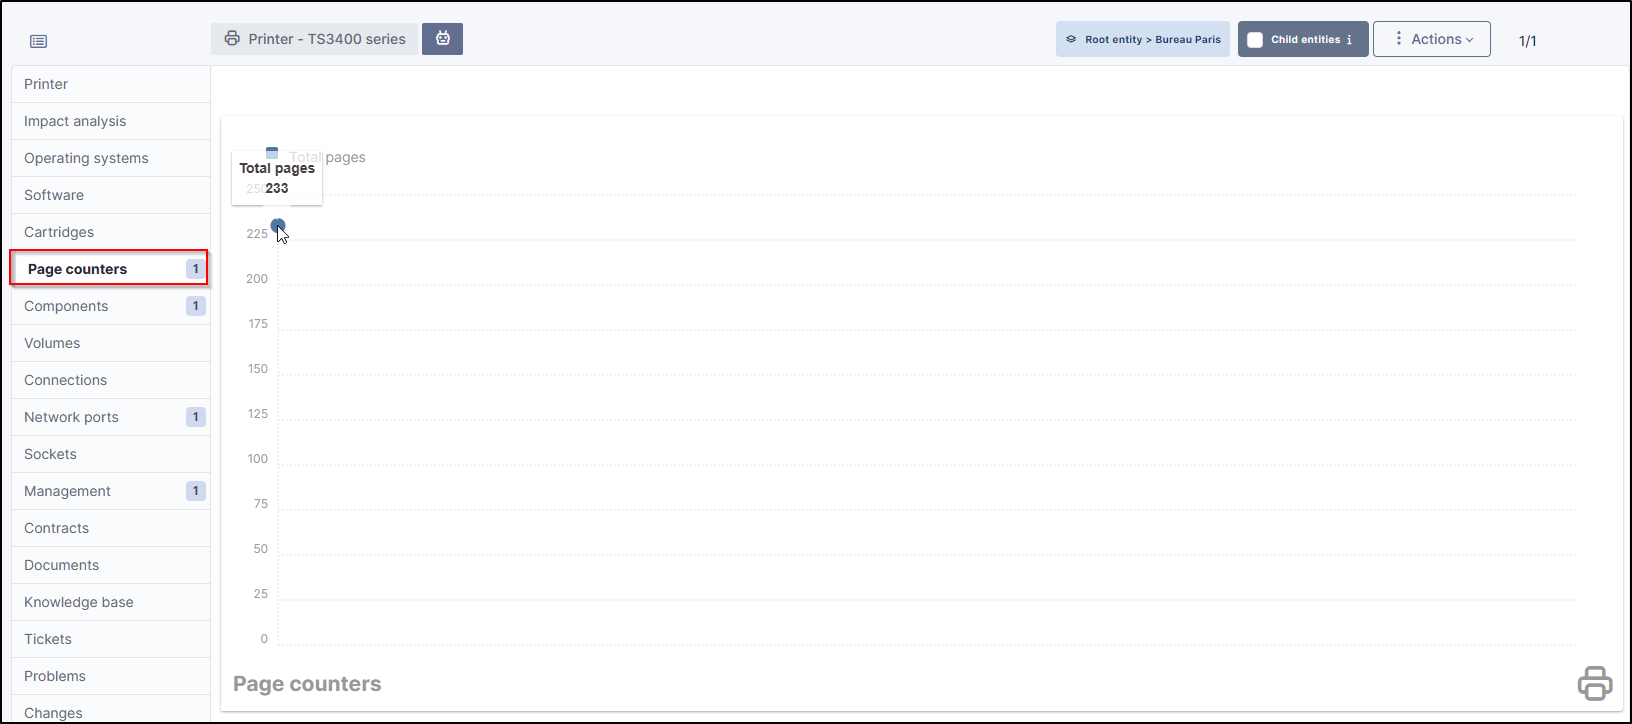
Now that the 2 tasks have been executed, you can return to printer (for our example) and see that our hardware has been implemented in the printer tab, in the entity corresponding to our rule:
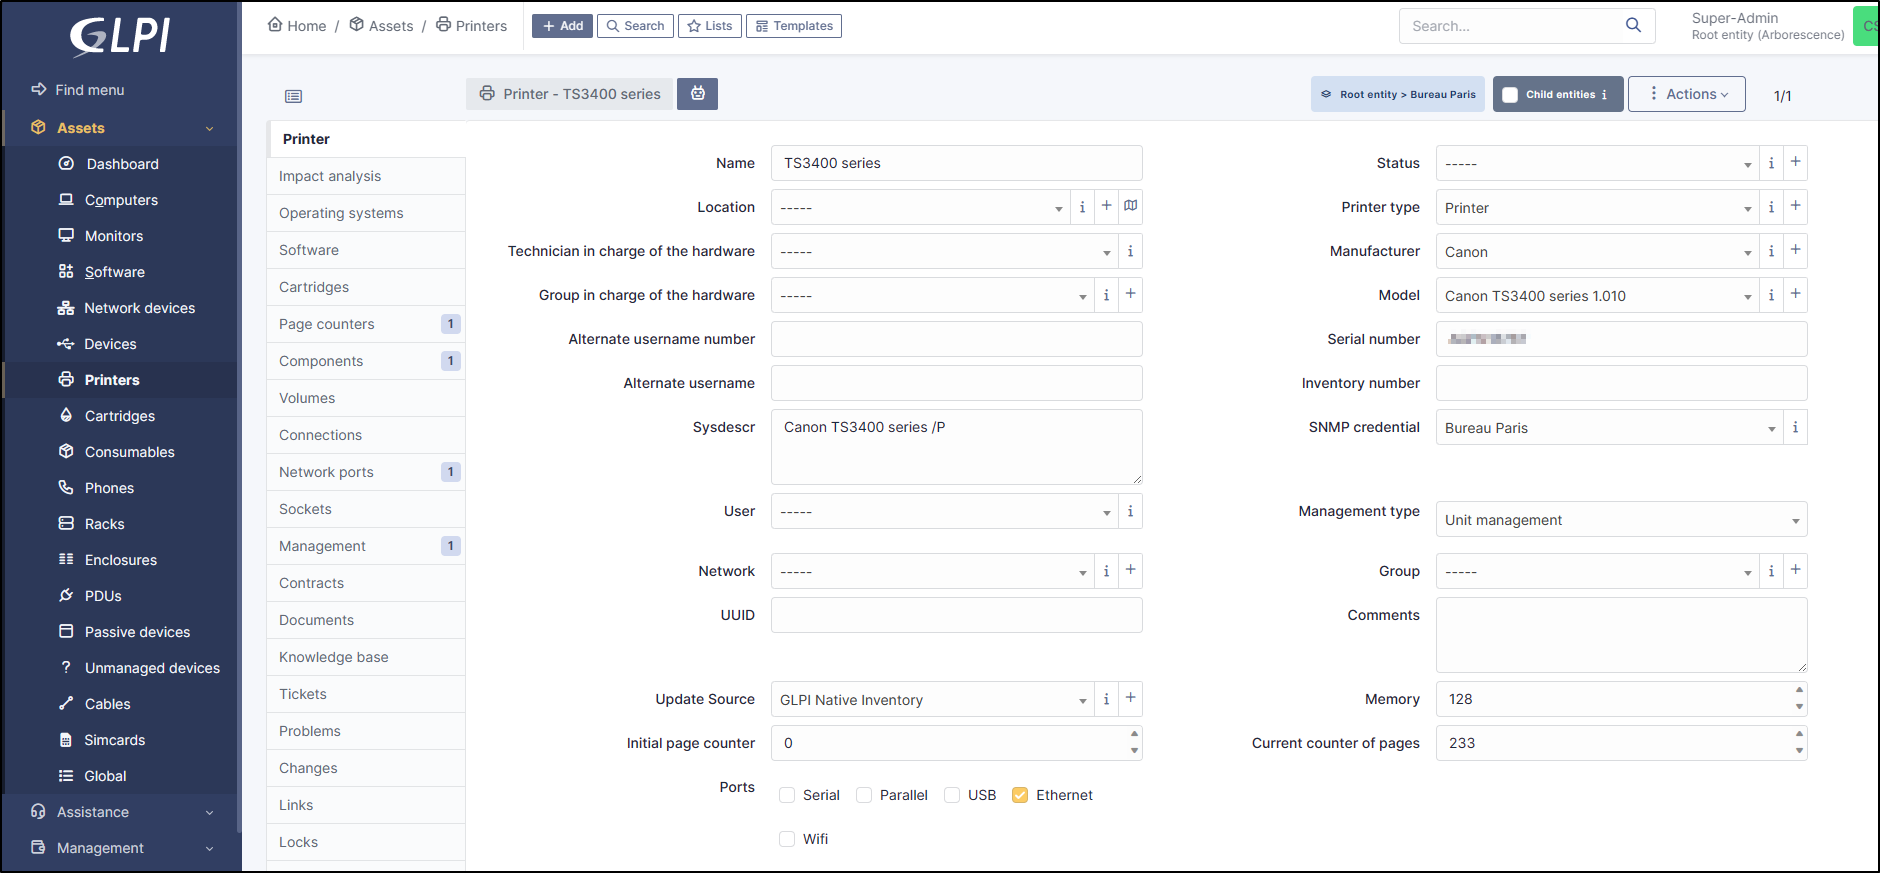
if your printer supports it, you can also see the status of the cartridges and the page counter