GlpiInventory Data collection#
Info
The GLPI Inventory plugin is available in the menu
Administration >
GLPI Inventory
If it is not installed, please go to the marketplace, and install the GLPI Inventory plugin
Declaration of a data to be queried#
Info
In the following example, we are going to check that the user has the thunderbird icon on his desktop (which in this case is a portable application).
Go to the
administration >
GLPI Inventory >
tasks >
computer information
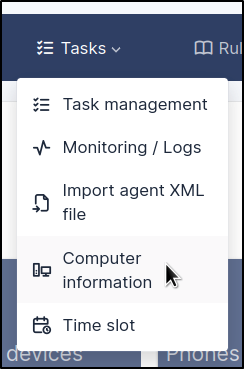
Then create a new item
ajouter :

The next window will allow you to enter the following information:
- A name
- A comment
- A type
- Registry
- WMI
- Search for a file
- Active or not
- Visible in a sub-entity or not
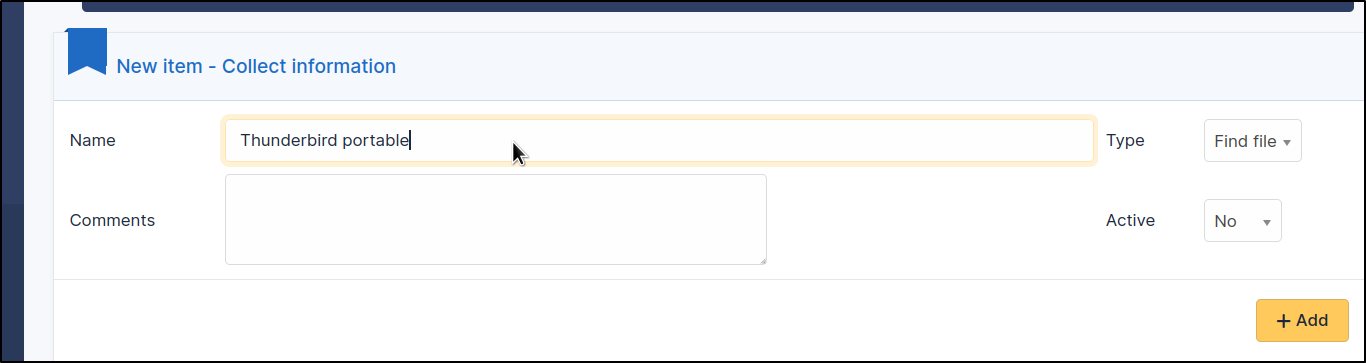
Once you've clicked on
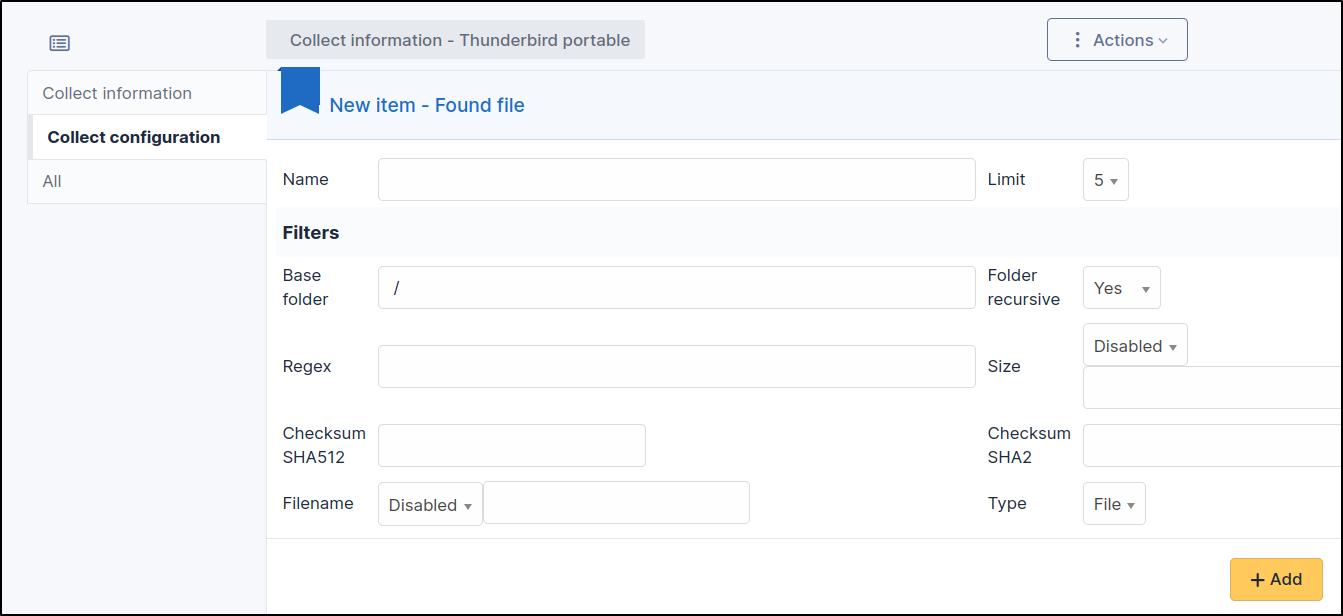
Add, a Collect configuration tab appears in the left-hand menu, allowing you to configure data collection for one of the following three options, depending on the chosen type:
- WMI Windows
- File search
- Windows registry
Creating the task#
Go to
administration >
GLPI Inventory >
tasks >
task management
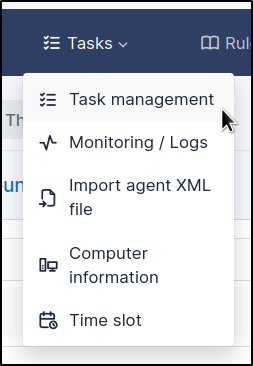
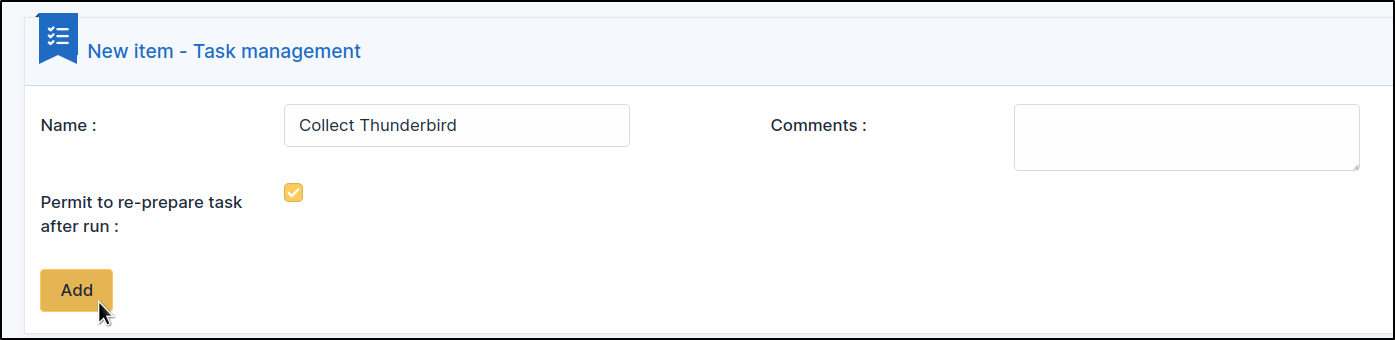
Then create a new task with
ajouter :

Create the task :
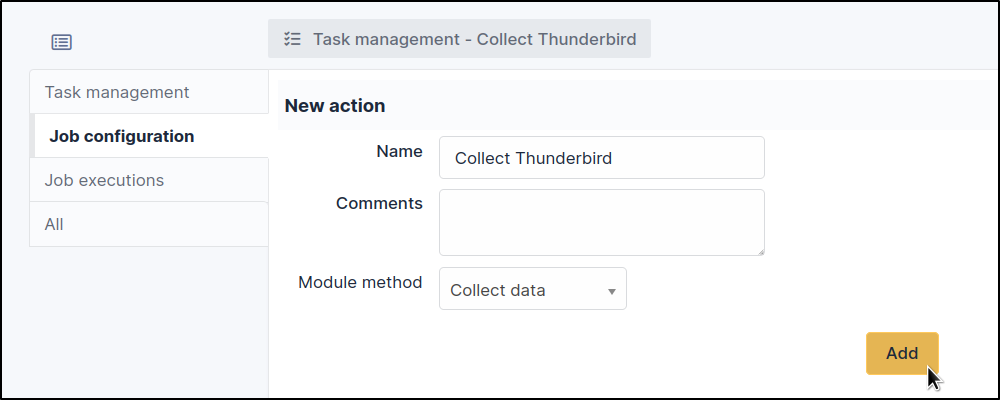
Then in Job configuration, add a job:
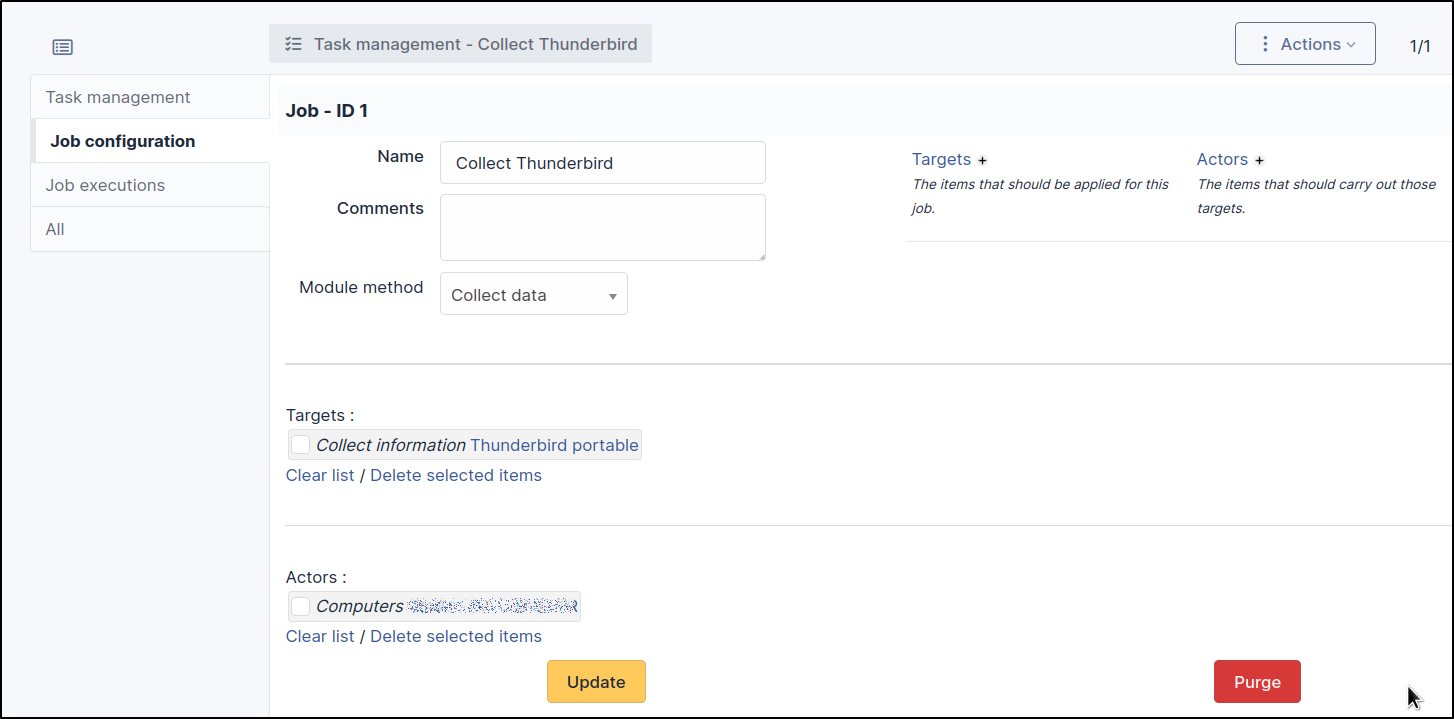
And configure the collect job in this task:
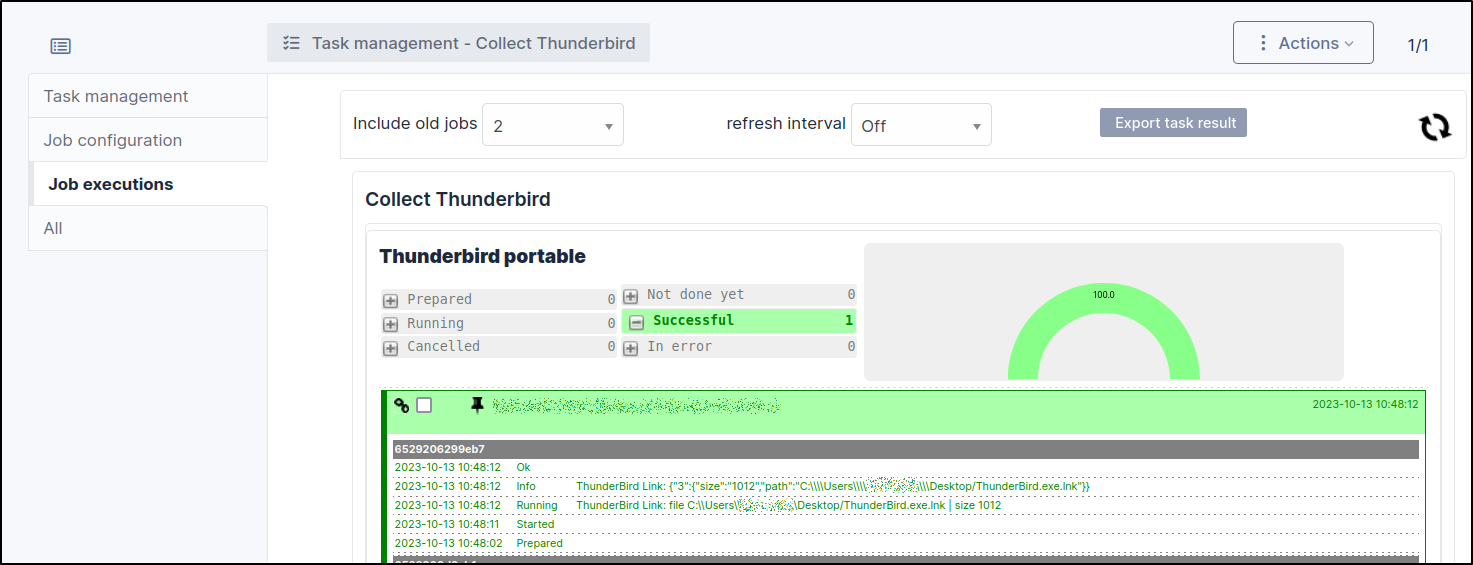
Once the job has been activated, prepared and taken over by the agent, you can see the result of the job execution here:
In the computer file, a new tab Collection information appears with the value found for the file:

