Cloud and LDAPS (Entra)#
Reminder of use#
Let's first remember that using an Entra directory allows two features with GLPI:
- Synchronize users
- Authenticate them.
Authentication can be done in two ways:
- LDAPS authentication via directory synchronization (of users) in GLPI
- Oauth SSO authentication (sync is not required)
We will now detail the configurations of these features.
Directory synchronisation and/or LDAPS authentication#
Entra AD requires the use of the LDAPS protocol to be synchronized. Microsoft has fully documented the configuration of its environment for the use of LDAPS. We therefore invite you to follow the official documentation here in order to prepare your Entra AD environment.
Note
Your Entra Tenant must have a sufficiently high license or the purchase of Microsoft Entra Domain Services may be necessary.
- Remember that you can determine the IP address of your GLPI Network Cloud instance by following the article here, if you want to establish LDAPS access rules on your Entra AD environment.
Warning
If your Entra AD environment is poorly prepared for LDAPS, it won't work on the GLPI side
- Also remember to create a service account (a user) in your directory, only dedicated to the interconnection between GLPI and your Entra AD directory.
Once your Entra AD environment has been prepared for LDAPS, go back to GLPI!
You must create an LDAP Directory type authentication source.
- Go to the
Setup>Authentication>LDAP Directory - Clicking on
addto add a new directory - We had to setup the new directory for LDAPS connections
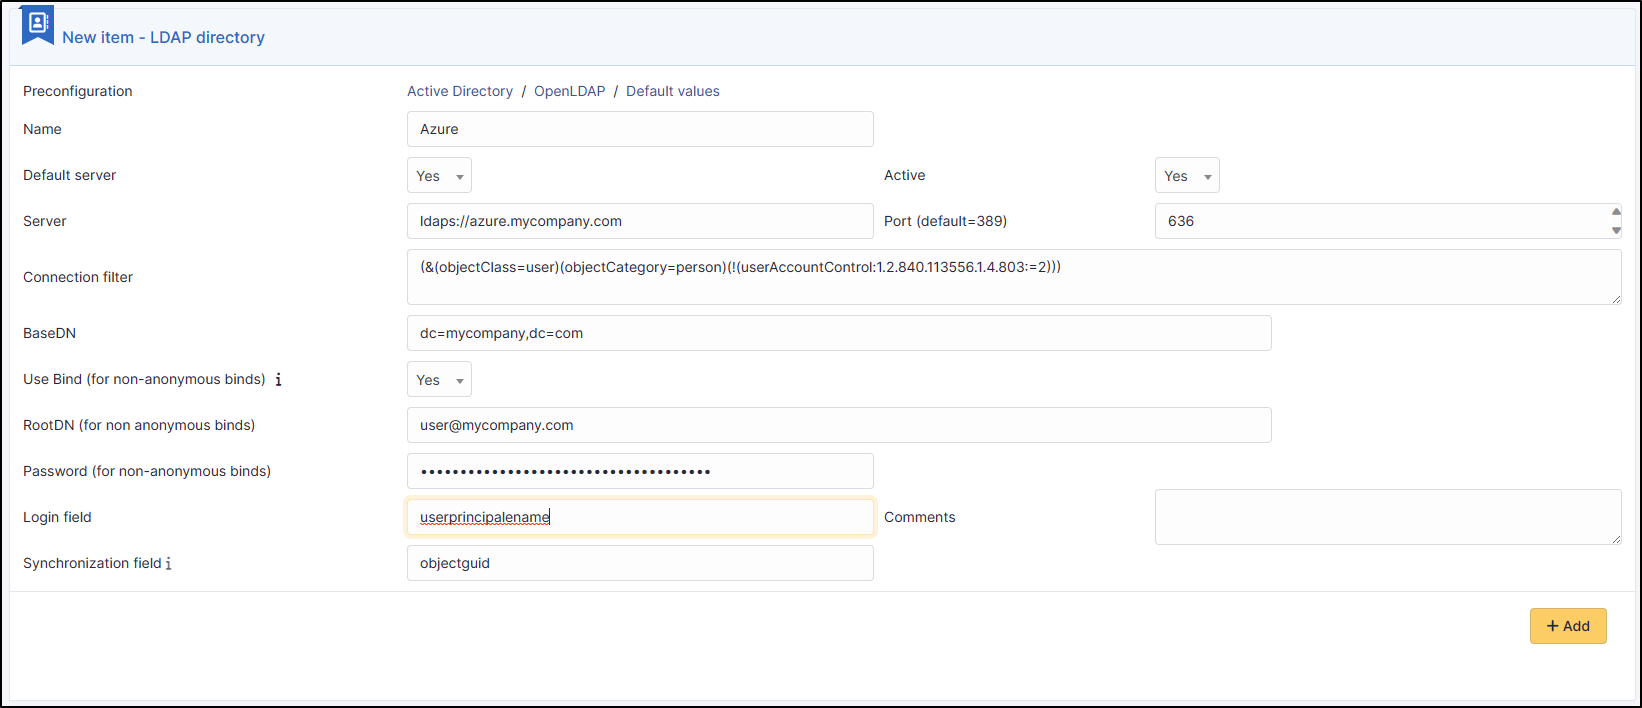
Explanation of fields :
-
Name
The name to enter here will be the one displayed in the liste of your directories, it doesn't influence the configuration. -
Default server
This parameter allows you to define if this directory should be used as a priority. -
Active
With this parameter, you can activate or not the directory -
Server
In front of IP or FQDN of you rLDAP server, addldaps://, e.g : ldaps://Entra.mycompany.com or ldaps://xxx.xxx.xxx -
Port
Enter the port of your LDAP. LDAPS requires port 636 -
Connexion filter
You can set a condition for the search. It possible to filter the user's search to a reduced number of records.
For Active Directory, use the following filter, which returns only no-disabled users (because machines are also considered users by AD):
(&(objectClass=user)(objectCategory=person)(!(userAccountControl:1.2.840.113556.1.4.803:=2)))
This filter is a standard example, you can modify it to your need.
- BaseDN
basedn
The basedn must be written without spaces after the commas. Also, the case must be the same
For standard use, the parameters to enter are very simple, for example :
If your Server = Entra.mycompany.com
So your BaseDN = dc=mycompany,dc=com
-
RootDN (for non-anonymous binds)
Enter here the full DN of the service account that will authenticate with your directory -
Password (for non-anonymous binds)
Enter here the password of the service account that will authenticate with your directory. Note that when saving the configuration, this field will appear empty, this is normal, the password will be saved in the database. -
Login field
- For Entra AD with SSO Authentication! We will indicate the field userprincipalname
- For Entra AD without SSO authentication! We will indicate the field samaccountname
-
Comments
This field does not influence the configuration, it is only a text field allowing you to place an indication, a remark, etc. -
Synchronization field
In the schemas provided by default, we recommend, for example, using the “objectGUID” attribute (corresponding to the official unique identifier of an object); Be careful with this field, once configured it cannot be modified.
Once the fields are entered, click Add to save your directory.
During registration, a connection test to your directory will be carried out by GLPI !
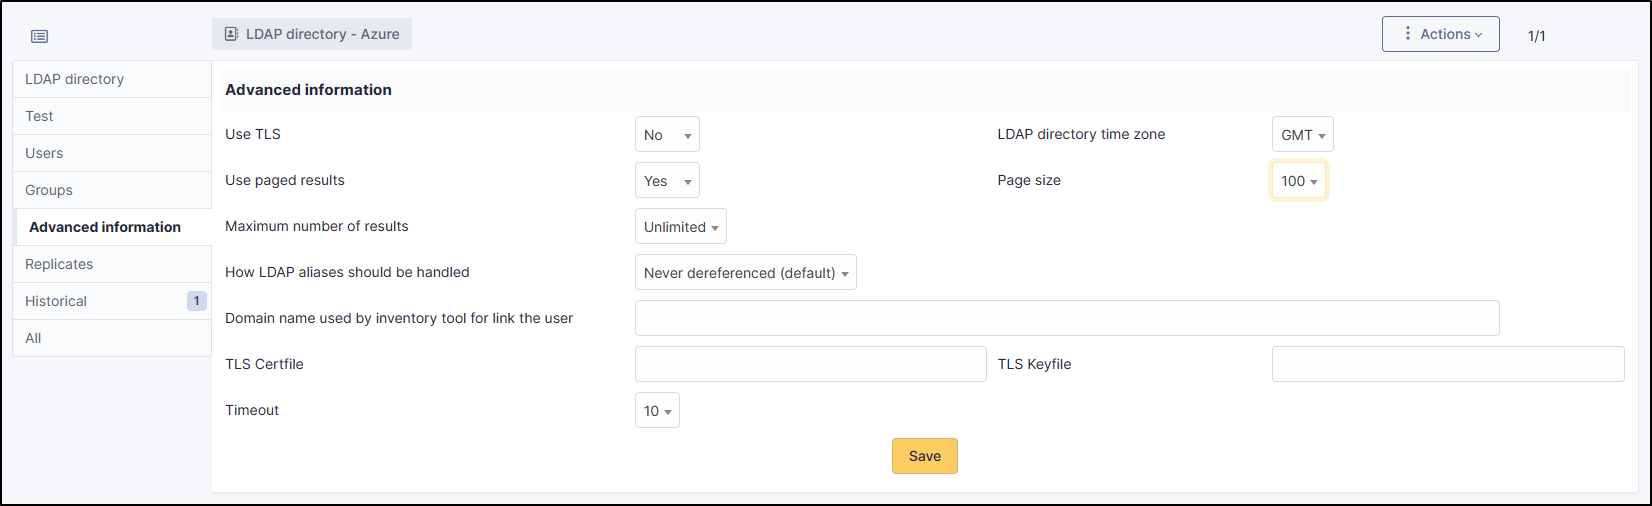
Additional options#
- Once your LDAPS connection has been registered, return to the configuration of your directory on GLPI side.
- In advanced information, change the Use Paginated Results field to Yes
- We recommend changing the page size to 100
- We recommend changing the field maximum number of results to unlimited
Your directory is connected but you have to define options to synchronize.
- To do this, go to your directory configuration and use the Users and Groups tabs by customizing the LDAP attributes you want to synchronize and the settings that are useful to you. This section is complete.